Category Archives: Linux

Compiling a Matlab C code with GCC/G++

In this post, I am sharing how to compile a C code generated by Matlab C coder with GCC compiler. Let me explain with an example.

1. Generating a C code with Matlab C coder.

I will use a very simple Matlab code, and the below is the code

function y = add_coder(a,b)
y=a+b

With the Matlab C coder, let’s auto-generate the C code. You have to specify the types of variables and some other options. If you just read the dialog box, it might not be difficult.

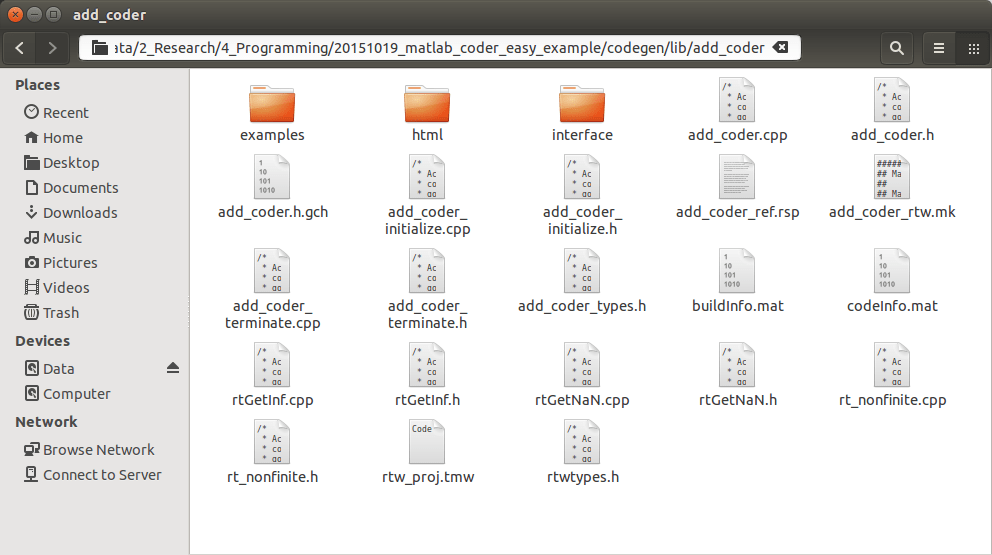
As a result, you can see this kind of result. If your Matlab version is not 2015, it might be little different, but its big flow is almost same.

directory_matlab_coder


2. Let’s compile the code generated by Matlab C coder

This is my main.cpp file that is modified from the auto-generated main.cpp by Matlab C coder

#include "rt_nonfinite.h"
#include "add_coder.h"
#include "add_coder_terminate.h"
#include "add_coder_initialize.h"
#include "stdio.h"

int main()
{
  /* Initialize the application.
     You do not need to do this more than one time. */
  add_coder_initialize();

  /* Invoke the entry-point functions.
     You can call entry-point functions multiple times. */
  double a=10;
  double b=20.0;
  double y;
  y = add_coder(a, b);
  printf("y: %lf\n",y);

  /* Terminate the application.
     You do not need to do this more than one time. */
  add_coder_terminate();
  return 0;
}

I located this main.cpp file with other all codes.

Now let’s compile all codes. Just compile main.cpp with all other cpp files. like this.

compilation_example


I am attaching all related files as a zip file. <Download>


Isn’t it easy??!!!

Have a good day~~!

libstdc++.so.6 error when using cross compiler in debian (e.g. ubuntu)

When I compile a source code for Beaglebone black (arm processor) in my ubuntu 12.04 local computer, I met the following problem.

error while loading shared libraries: libstdc++.so.6: cannot open shared object file: No such file or directory

The solution is !!

Copy the below text

” deb http://www.emdebian.org/debian unstable main ”

and, go to the package source folder.  /etc/apt/sources.list.d

Then, paste the text in a source list file (e.g, lubuntu-desktop-ppa-precise.list)

Then update or install all necessary files like this.

# apt-get install build-essential
# apt-get install libc6-armhf-cross
# apt-get install libc6-dev-armhf-cross
# apt-get install binutils-arm-linux-gnueabihf
# apt-get install linux-libc-dev-armhf-cross
# apt-get install libstdc++6-armhf-cross
# apt-get install gcc-4.7-arm-linux-gnueabihf
# apt-get install g++-4.7-arm-linux-gnueabihf


I got this solution from a reply of this website.

http://derekmolloy.ie/beaglebone/setting-up-eclipse-on-the-beaglebone-for-c-development/

I really appreciate.

I hope this can help your project.


-Mok-

Maxon EPOS2 Driver C++ Class using USB-CAN Gateway for Multiple Motor Actuation

I am sharing a C++ Class for multiple Maxon motor actuation by EPOS2 via USB-Can gateway.

The source code is written for two motors, but it is possible to modify easily to actuate multiple motors.

<Download>

If you want to see a simpler version for one motor actuation, see this article. 

I hope this article makes your life easier.

-Mok-

UDP Server C++ Class with a listening thread


DO NOT USE THIS CODE ANY LONGER. TOO MUCH OUTDATED AND BUGGY


I am sharing a code for “UDP Server C++ Class with a listening thread”. In the class “UDPThread”, a thread is running to receive a UDP packet.

<Download>

Just compile a demo program with this command. Then you will understand.

g++ demo_udp_server.cpp UDPThread.cpp -lpthread -o demo_udp_server

This is the result.

Screenshot from 2015-03-04 15:44:40

<Download>

I hope this code helps your project.

-Mok-

Minimal c++ class for Maxon EPOS2

Minimal c++ class for Maxon EPOS2

I am sharing the minimal C++ class for Maxon EPOS2. It includes a basic “initialization”, “Move”, “Read position”, “Close device” functions. The program consists of a class called “cmaxonmotor”.  You can download the class and demo program here

<Download>

You can see a simple demo program here.

#include <stdio.h>
#include <iostream>
#include "cmaxonmotor.h"

using namespace std;

int main(int argc, char *argv[])
{
    CMaxonMotor motor("USB0",1);
    motor.initializeDevice(); // initialize EPOS2

    long TargetPosition = -200000;
    int CurrentPosition = 0;

    motor.Move(TargetPosition); // move to the target position

    cout << "Press <Enter> to stop and quit..." << endl;
    getchar();
    motor.GetCurrentPosition(CurrentPosition); // get the current position
    cout << "Current Position: " << CurrentPosition << endl;

    motor.closeDevice(); // close EPOS2

    return 0;
}


You can control one motor just via USB, and also able to control multiple motors via USB-CAN gateway. For this version, see this article.

I hope this helps your project.


-Mok-

Simple Example Using Shared Variable in QT Multi-thread with QMutex

Simple Example Using shared variable in QT multi-thread with QMutex

Today, in this post, I want to share my simple example code to explain how to use shared variables in QT multi-thread environments with QMutex.

In the example, first I will generate an Int variable to be shared.

Then, I will make two threads. Each thread has their own ID. and they will try to change the shared number with their ID number.

After changing the shared number in their threads to be same with its ID, the thread will check if the shared number is really same with the ID. If the other thread changes the shared variable just before the check, it will print out an error message.

Without Mutex, it will give us many error message, and with Mutex, we can remove this collision error.

You can download full package of source code from here  <Download>.

Also, you can just see and understand by watching the below codes and results with or without Mutex.

main.cpp

#include <QtCore/QCoreApplication>
#include "mythread.h"

int main(int argc, char *argv[])
{
    QCoreApplication a(argc, argv);
    QMutex mMutex;

    int sharedVar=10;
    qDebug() << "sharedVar :"<< sharedVar;

    MyThread mThread1(&mMutex,1,&sharedVar);
    MyThread mThread2(&mMutex,2,&sharedVar);

    mThread1.start();
    mThread2.start();

    return a.exec();
}

mythread.h

#ifndef MYTHREAD_H
#define MYTHREAD_H

#include <QtCore>
#include <QMutex>

class MyThread : public QThread
{
private:
    QMutex* mutex;
public:
    MyThread(QMutex* mu, int myNum, int* sharedNum);
    int myNumber;
    int* num;


protected:
    void run();

};

#endif // MYTHREAD_H

mythread.cpp

#include "mythread.h"
#include <QtCore>
#include <QDebug>
#include <QMutexLocker>

MyThread::MyThread(QMutex* mu, int myNum, int* sharedNum)
{
    mutex= mu;
    myNumber = myNum;
    num = sharedNum;

}

void MyThread::run(){

    qDebug() << "Thread " << myNumber << "num: " << num << "*num: " << *num;
    for (int i=0;i<5;i++){

        mutex->lock(); // To avoid collision

        qDebug() << i << "Before Change, My Number : "<< myNumber << "*num" << *num  ;
        (*num) = myNumber;
        usleep(10);
        if ( *num != myNumber ){
            qDebug() << "! collision ! at Thread" <<  myNumber ;
        }
        qDebug() << i << "After  Change, My Number : "<< myNumber << "*num" << *num  ;

        mutex->unlock(); // Let's release the lock
        usleep(1);

    }
}


QMutexTest.pro

QT       += core
QT       -= gui

CONFIG   += console
SOURCES += main.cpp \
    mythread.cpp
HEADERS += \
    mythread.h


Result ( with Mutex)

QMutex


Result ( If I remove mutex part)QMutex2


I wish everybody understands this one. If you want to study more deeply, I recommend to read this post. http://stackoverflow.com/questions/8971168/how-to-use-qmutex

If you cannot understand, please leave me a reply.


—————————————————————————————————————————–

I am Youngmok Yun, and writing about robotics theories and my research.

My main site is http://youngmok.com, and Korean ver. is  http://yunyoungmok.tistory.com.

—————————————————————————————————————————–


Terminator installation and setting as a default terminal program

I strongly recommend to use Terminator as a default terminal program in Linux.

It has many great functions such as horizontal/vertical tab split.

First. Installation.

$ sudo apt-get install terminator

Second, Setting as a default terminal program

gconftool --type string --set /desktop/gnome/applications/terminal/exec terminator

It is done!!!

Good luck

Simple C++ Code for Multi Dynamixel Servo Motor Control

Simple C++ Code for Multi Dynamixel Servo Motor Control


// this post is updated to eliminate the dependency on QT, 2015.06.26


In this post, I am sharing my C++ class to control multi Dynamixel servo motors.

In my case, I am using MX-24f, but most of dynamixel servo motors are using the same protocol. Thus, you can use this code directly. I am attaching all files (dynamixel library and others) to execute a demo program.

<Download>

If you don’t need common files, just use “multi_dnmx_motor.h” and “multi_dnmx_motor.cpp”. For the usage, see “main.cpp” file. It is super easy.  Demo program was made for Linux environment, but Windows uses still can use “multi_dnmx_motor” class

If you don’t know anything about Dynamixel program. Just follow the below.


0. Before following this instruction, check if the connection and settings are correct with “RoboPlus Manager” which can be downloaded in Robotis website, >> Support >> Download.

1. Go to “Dynamixel_src” folder.

2. “Make” : It will generate a library and automatically copy the lib. to the library folder.

3. Go to “Multi_Dynamixel_Motor_Control” folder.

4. Open “multi_dnmx_motor.h” file

5. Change “user setting”. You have to set the baud_rate, number of motors, and their motor IDs. Just change defines. (If you don’t know motors’ these values, use “RoboPlus”, a super easy program, and available in the Robotis website, http://support.robotis.com/en/ )

// User setting
#define BAUD_NUM 34 // 1: 1Mbps 34:57142bps
#define NUM_OF_MOTORS 4 // Number of motors

#define MOTOR_ID_1 1 // Motor 1 ID
#define MOTOR_ID_2 2 // Motor 2 ID
#define MOTOR_ID_3 3 // Motor 3 ID
#define MOTOR_ID_4 4 // Motor 4 ID

6.  compile it with this command

” g++ main.cpp multi_dnmx_motor.cpp -I../include -L../lib -ldxl  ”

7. Execute the program.


Good luck ^_^

<Download>

Add a shared object (*.so) file in qt project file (pro), example

The following is an example.

#————————————————-
#
# Project created by QtCreator 2013-12-20T11:36:03
#
#————————————————-

QT       -= gui

TARGET = Mocap_QT
CONFIG   += console
CONFIG   -= app_bundle

LIBS += ./lib/libowlsock.so

INCLUDEPATH += ./include/

TEMPLATE = app

SOURCES += main.cpp